
Chapter 4: Image Manipulation
Contents
4.1 Resizing Algorithms
Prior to version 2.2, AspJpeg supported three popular image resizing algorithms: nearest-neighbor, bilinear and bicubic. As of version 2.2, it supports 13 more. Resizing algorithms vary greatly in terms of quality of thumbnail output, sharpness and performance.
The algorithm for your thumbnails is specified via the Interpolation property. The default algorithm is bilinear (1). The table below summarizes all available algorithms, their sample output and performance compared to the default algorithm. Note that thumbnail quality is usually gained at the expense of performance.
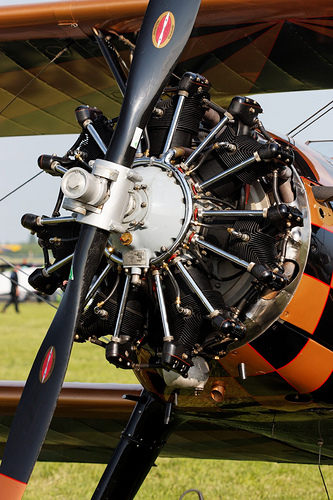
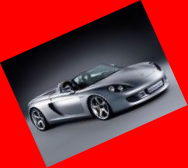
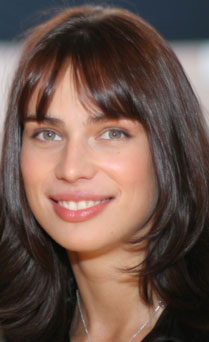
Original image:
(All versions)

(All versions)
(All versions)

(Version 2.2+)

(Version 2.2+)

(Version 2.2+)

(Version 2.2+)

(Version 2.2+)

(Version 2.2+)
(Version 2.2+)

(Version 2.2+)

(Version 2.2+)

(Version 2.2+)

(Version 2.2+)

(Version 2.2+)

(Version 2.2+)

4.2 Image Sharpening
Starting with Version 1.1, AspJpeg is capable of applying a sharpening filter to an image being resized via the method Sharpen. A regular thumbnail and two thumbnails with various degrees of sharpening applied to them are shown below.


The Sharpen method uses two Double arguments: Radius and Amount. Radius controls the size (in pixels) of an area around every pixel that the sharpening algorithm examines. This argument should normally be set to 1 or 2. Amount (expressed in %) specifies the degree of sharpness. This argument must be greater than 100.
For this property to take effect, it must be set before calling Save, SendBinary or Binary.
4.3 Image Cropping
AspJpeg 1.1+ is also capable of cutting off edges from, or cropping, the resultant thumbnails via the method Crop(x0, y0, x1, y1). The size of the cropped image is specified by the coordinates of the upper-left and lower-right corners within the resultant thumbnail, not the original large image.
If one or more coordinates passeed to the Crop method are outside the coordinate space of the image, this will actually expand the "canvas" around the image. This is useful, for example, if you need to create margins around the image. The following code creates a 10-pixel margin around an image:
IMPORTANT: Before version 1.7, the color of the margins created by "negative" cropping was always white. Starting with version 1.7, it is determined by the color specified via Canvas.Brush.Color, and is black by default. To create a white 10-pixel margin with version 1.7+, the following code should be used:
jpeg.Crop -10, -10, jpeg.Width + 10, jpeg.Height + 10
4.4 Image Flipping and Rotation
With AspJpeg 1.2+, you can invert an image horizontally and/or vertically by calling the methods FlipH and FlipV, respectively.
You can also rotate an image 90 degrees clockwise and counter-clockwise by calling the methods RotateR and RotateL, respectively.
As of Version 2.3, AspJpeg is capable of rotating an image by an arbitrary angle via the method Rotate. The method expects two arguments: the angle (in degrees) of the counterclockwise rotation, and the fill color of the four triangular corner areas formed by the rotation. The width and height of the image are automatically increased to accommodate the slanted image.
The following code rotates the image by 24 degrees and fills the corners with red color.
The result is as follows:
AspJpeg is also capable of removing the corner areas entirely by making them fully transparent with the help of PNG image format. This way, the rotated image can be drawn on top of another image. This functionality is covered in Section 10.4 - Using PNG Format for Image Rotation.
4.5 Adjusting Image Compression
The JPEG format uses "lossy" compression methods. This means that some minor details of an image saved as a JPEG are lost during compression. The degree of loss can be adjusted via the Jpeg.Quality property. This property accepts an integer in the range 0 to 100, with 0 being the highest degree of loss (and hence, the lowest quality) and 100 being the lowest degree of loss and highest quality.
The lower the loss, the larger the resultant file size. The property Jpeg.Quality is set to 80 by default which provides a close-to-optimal combination of quality and file size.
When the property Jpeg.OutputFormat is set to 3 (WEBP output format), lossy compression is used by default, also subject to the Jpeg.Quality property. To enable lossless compression, the property Jpeg.Baseline needs to be set to False. The Jpeg.Quality value is ignored in this case.
4.6 Grayscale Conversion
Starting with version 1.4, AspJpeg is capable of converting a color image to grayscale via the Grayscale method. This method expects a Method argument which specifies a formula to perform the color-to-B&W conversion. The valid values are 0, 1, and 2. The value of 1 is the recommended method for most applications.
The Grayscale method sets the three color components (R, G, B) of each pixel to the same value L using the following formulas:
| Method | Formula |
| 0 | L = 0.3333 R + 0.3333 G + 0.3333 B |
| 1 | L = 0.2990 R + 0.5870 G + 0.1140 B |
| 2 | L = 0.2125 R + 0.7154 G + 0.0721 B |
The effect of the Method argument is demonstrated by the chart below:
| Method | Effect |
| Original Image | 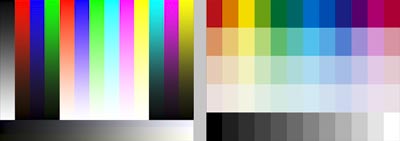 |
| 0 | 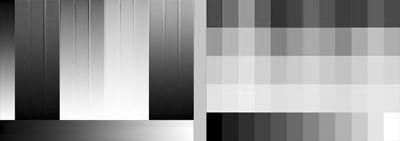 |
| 1 |  |
| 2 | 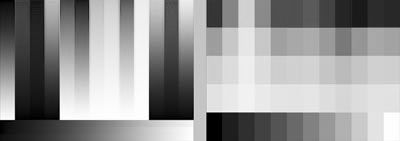 |
The effect of Method 0 is what Photoshop calls desaturation (Image/Adjust/Desaturate), while Method 1 is similar to Photoshop's conversion from RGB to grayscale (Image/Mode/Grayscale).
Note that Grayscale is a method, not a property, so the '=' sign should not be used:
The Grayscale method changes the colors of the image to B&W but leaves the image in the original RGB colorspace (3 bytes per pixel.) As of Version 2.1, AspJpeg can also convert RGB or CMYK images to the grayscale colorspace (1 byte per pixel) via the method Jpeg.ToGrayscale which accepts the same argument as Grayscale. The ToGrayscale method makes the image file smaller, and is also useful for PNG alpha channel management described in Chapter 10.
4.7 Sepia Filter
AspJpeg 1.6+ offers the Sepia method which makes an image look like an old photograph. This method's two parameters, Hue and Contrast, enable you to adjust the output to your taste.
The Hue parameter controls the brownish hue of the output image, and should usually be in the range of 25 to 60 for good results. The Contrast parameter controls the contrast of the image. The value of 1 means no contrast adjustment. Values between 1.2 and 1.5 usually produce good results.

The sample Sepia conversion shown here was achieved as follows:
4.8 Code Sample
The following code sample demonstrates most of the above mentioned features by interactively applying various transformations to an image. The file 04_params.asp/aspx contains a form with checkboxes and radio buttons controlling the visual appearance of the image. This file invokes the script 04_process.asp/aspx which contains the actual image modification routine shown below.
Jpeg.Open Server.MapPath("clock.jpg")
Jpeg.Width = Jpeg.OriginalWidth * .8
Jpeg.Height = Jpeg.OriginalHeight * .8
If Request("Grayscale") = "1" Then
Jpeg.Grayscale 1
End If
If Request("Sharpen") = "1" Then
Jpeg.Sharpen 1, 250
End If
If Request("Horflip") = "1" Then
Jpeg.FlipH
End If
If Request("Verflip") = "1" Then
Jpeg.FlipV
End If
Jpeg.Quality = Request("Quality")
Jpeg.Interpolation = Request("Interpolation")
If Request("Crop") = 1 Then
Jpeg.Crop 30, 30, 470, 320
End If
Jpeg.SendBinary
%>
<%@ Import Namespace="System.Reflection" %>
<%@ Import Namespace="ASPJPEGLib" %>
<%@ Page aspCompat="True" Language="C#" Debug="true" %>
<script runat="server" LANGUAGE="C#">
void Page_Load(Object Source, EventArgs E)
{
ASPJPEGLib.IASPJpeg objJpeg;
objJpeg = new ASPJPEGLib.ASPJpeg();
objJpeg.Open( Server.MapPath("clock.jpg") );
objJpeg.Width = (int)(objJpeg.OriginalWidth * 0.8);
objJpeg.Height = (int)(objJpeg.OriginalHeight * 0.8);
if( Request["Grayscale"] == "1" )
objJpeg.Grayscale( 1 );
if( Request["Sharpen"] == "1" )
objJpeg.Sharpen( 1, 250 );
if( Request["Horflip"] == "1" )
objJpeg.FlipH();
if( Request["Verflip"] == "1" )
objJpeg.FlipV();
objJpeg.Quality = int.Parse(Request["Quality"]);
objJpeg.Interpolation = int.Parse(Request["Interpolation"]);
if( Request["Crop"] == "1" )
objJpeg.Crop( 30, 30, 470, 320 );
objJpeg.SendBinary(Missing.Value);
}
</script>
Click the links below to run this code sample:


