
Chapter 1: Introduction & Quick Start
Contents
1.1 What is AspJpeg?
AspJpeg is an advanced image management component to be used in a Microsoft IIS environment.
AspJpeg enables your ASP/ASP.NET application to dynamically create high-quality thumbnails of images in just a few lines of code. An original image may be in any of the following formats: JPEG, GIF, BMP, TIFF, PNG or WEBP.
This component can be used in tandem with AspUpload, the leading file upload component from Persits Software, Inc., to create thumbnails of images as they are being uploaded to the Web server.
1.2 Feature Summary
- Supports JPEG, GIF, BMP, TIFF and PNG formats as input.
- Source images can be opened from disk, memory, or a recordset.
- Resized images can be saved to disk, memory or an HTTP stream.
- Supports three resizing algorithms: nearest-neighbor, bilinear, and bicubic.
- Drawing and typing on top of an image. Support for TrueType and Type 1 fonts.
- Automatic word wrapping, text alignment to the left, right, center and justified, rotation.
- Picture-in-picture support.
- Cropping, flipping, rotation, sharpening, grayscale conversion.
- Compression rate of output images can be adjusted for optimal quality/file size ratio.
- EXIF and IPTC metadata extraction from JPEG images.
- Metadata preservation during resizing.
- IPTC metadata adding and editing.
- CMYK-to-RGB conversion.
- Sepia filter.
- Read/write access to individual pixels of an image.
- PNG alpha channel support.
- PNG output, alpha channel preservation.
- GIF transparency support.
- Brightness, contrast and saturation adjustment.
- GIF output, transparency and animation preservation.
- JPEG-to-GIF conversion.
- Antialiased drawing routines.
- Perspective projection.
- Gaussian blur, edge detection, threshold, other filters.
- Chroma key effect.
- 3D surface mapping.
- WebP format support, both as input and output. New in 2.9.0.2
1.3 System Requirements
Windows NT • 2000 • XP • 2003 • Vista • 2008 • 7 • 2012 • 8 • 2016 • 2019, • 2022 and
IIS 4.0+ and ASP/ASP.NET, or
Visual Basic 6.0+, or
Visual C++ 6.0+, or
any other development environment supporting COM.
1.4 Installation
The setup application aspjpeg.exe installs and registers the AspJpeg component along with documentation and samples in a directory of your choice. To install AspJpeg on another computer, it is sufficient to copy the file aspjpeg.dll to the other system and register it there using the regsvr32 command-line utility as follows:
c:\>regsvr32 c:\path\aspjpeg.dll
If that machine was already running an older version of the component, you should shut down and restart the IIS services to remove the old version of the DLL from memory, as follows:
c:\>net start w3svc
The setup installs a 30-day evaluation copy of the AspJpeg component. The evaluation version is fully functional, i.e. no features are disabled or limited. After 30 days, the component will start throwing an expiration error unless/until a registration key is installed. A registration key can be purchased here. Once a key is obtained, you can import it into the system registry without re-installing the component. Your web server does not need to be shut down.
It is strongly recommended that NTFS permissions be adjusted on the \Samples directory and all subdirectories to avoid an "Access is denied" or other errors when running the code samples. Using Windows Explorer, right-click on the directory c:\Program Files\Persits Software\AspJpeg\Samples, select the Security tab and give the "Everyone" account full control over this folder. Click "Advanced..." and make sure the checkbox "Reset permissions on all child objects..." is checked, as follows:
1.5 Expiration Mechanism
Like other Persits Software components such as AspUpload and AspEmail, AspJpeg uses a registration key-based expiration mechanism. Once a copy of the product is purchased, the registration key is sent to the customer via email.
Once the key is obtained, it should be installed in the system registry under the location HKEY_LOCAL_MACHINE\Software\Persits Software\AspJpeg\RegKey as a default value. The AspJpeg.exe installer will place the key in this registry location automatically, or you may choose to do it manually using regedit.
Alternatively, the registration key can be specified in your code via the RegKey property of the top-level ASPJpeg object, as follows:
Jpeg.RegKey = "12345-67890-12345"
...
The current expiration date of the component can be retrieved via the Expires property, as follows:
Response.Write Jpeg.Expires
If this property returns 9/9/9999 it means a permanent registration key is being used.
1.6 Quick Star
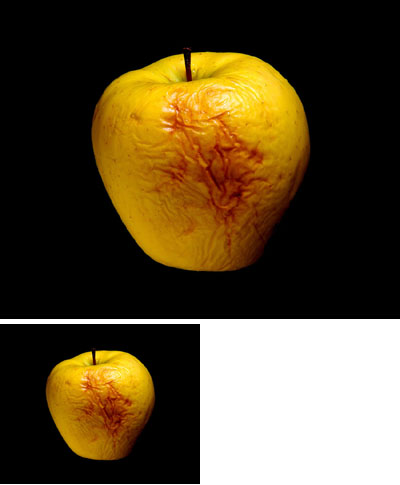
The following code sample opens an image from disk and creates a 50% scaled-down thumbnail of the image:
' Create instance of AspJpeg
Set Jpeg = Server.CreateObject("Persits.Jpeg")
' Compute path to source image
Path = Server.MapPath("../images/apple.jpg")
' Open source image
Jpeg.Open Path
' Decrease image size by 50%
Jpeg.Width = Jpeg.OriginalWidth / 2
Jpeg.Height = Jpeg.OriginalHeight / 2
' create thumbnail and save it to disk
Jpeg.Save Server.MapPath("apple_small.jpg")
%>
void Page_Load(Object Source, EventArgs E)
{
ASPJPEGLib.IASPJpeg objJpeg;
objJpeg = new ASPJPEGLib.ASPJpeg();
// Compute path to source image
String strPath = Server.MapPath("../images/apple.jpg");
// Open source image
objJpeg.Open( strPath );
// Decrease image size by 50%
objJpeg.Width = objJpeg.OriginalWidth / 2;
objJpeg.Height = objJpeg.OriginalHeight / 2;
// Create thumbnail and save it to disk
objJpeg.Save( Server.MapPath("clock_small.jpg" ) );
OriginalImage.Src = "apple.jpg";
SmallImage.Src = "apple_small.jpg";
}
</script>
Click the links below to run this code sample:

